 |
| What You'll Be Creating |
In this tutorial, I'm going to show you how to build a Software-as-a-Service (SaaS) minimum viable product (MVP). To keep things simple, the software is going to allow our customers to save a list of notes.
I am going to offer three subscription plans: the Basic plan will have a limit of 100 notes per user, the Professional plan will allow customers to save up to 10,000 notes, and the Business plan will allow a million notes. The plans are going to cost $10, $20 and $30 per month respectively. In order to receive payment from our customers, I'm going to use Stripe as a payment gateway, and the website is going to be deployed to Azure.
2. Setup
2.1 Stripe
In a very short time Stripe has become a very well known Payment Gateway, mainly because of their developer-friendly approach, with simple and well-documented APIs. Their pricing is also very clear: 2.9% per transaction + 30 cents. No setup fees or hidden charges.
Credit card data is also very sensitive data, and in order to be allowed to receive and store that data in my server, I need to be PCI compliant. Because that's not an easy or quick task for most small companies, the approach that many payment gateways take is: You display the order details, and when the customer agrees to purchase, you redirect the customer to a page hosted by the payment gateway (bank, PayPal, etc), and then they redirect the customer back.
Stripe has a nicer approach to this problem. They offer a JavaScript API, so we can send the credit card number directly from the front-end to Stripe's servers. They return a one-time use token that we can save to our database. Now, we only need an SSL certificate for our website that we can quickly purchase from about $5 per year.
Now, sign up for a Stripe account, as you'll need it to charge your customers.
2.2 Azure
As a developer I don't want to be dealing with dev-ops tasks and managing servers if I don't have to. Azure websites is my choice for hosting, because it's a fully managed Platform-as-a-Service. It allows me to deploy from Visual Studio or Git, I can scale it easily if my service is successful, and I can focus on improving my application. They offer $200 to spend on all Azure services in the first month to new customers. That's enough to pay for the services that I am using for this MVP. Sign up for Azure.
2.3 Mandrill and Mailchimp: Transactional Email
Sending emails from our application might not seem like a very complex task, but I would like to monitor how many emails are delivered successfully, and also design responsive templates easily. This is what Mandrill offers, and they also let us send up to 12,000 emails per month for free. Mandrill is built by MailChimp, so they know about the business of sending emails. Also, we can create our templates from MailChimp, export them to Mandrill, and send emails from our app using our templates. Sign up for Mandrill, and sign up for MailChimp.
2.4 Visual Studio 2013 Community Edition
Last but not least, we need Visual Studio to write our application. This edition, which was launched only a few months ago, is completely free and is pretty much equivalent to Visual Studio Professional. You can download it here, and this is all we need, so now we can focus on the development.
3. Creating the Website
The first thing that we need to do is open Visual Studio 2013. Create a new ASP.NET Web Application:
- Go to File > New Project and choose ASP.NET Web Application.
- On the ASP.NET template dialog, choose the MVC template and select Individual User Accounts.
 |
This project creates an application where a user can login by registering an account with the website. The website is styled using Bootstrap, and I'll continue building the rest of the app with Bootstrap. If you hit F5 in Visual Studio to run the application, this is what you will see:
 |
This is the default landing page, and this page is one of the most important steps to convert our visitors into customers. We need to explain the product, show the price for each plan, and offer them the chance to sign up for a free trial. For this application I am creating three different subscription plans:
- Basic: $10 per month
- Professional: $20 per month
- Business: $30 per month
3.1 Landing Page
For some help creating a landing page, you can visit ThemeForest and purchase a template. For this sample, I am using a free template, and you can see the final result in the photo below.
 |
3.2 Registration Page
In the website that we created in the previous step, we also get a Registration form template. From the landing page, when you navigate to Prices, and click on Free Trial, you navigate to the registration page. This is the default design:
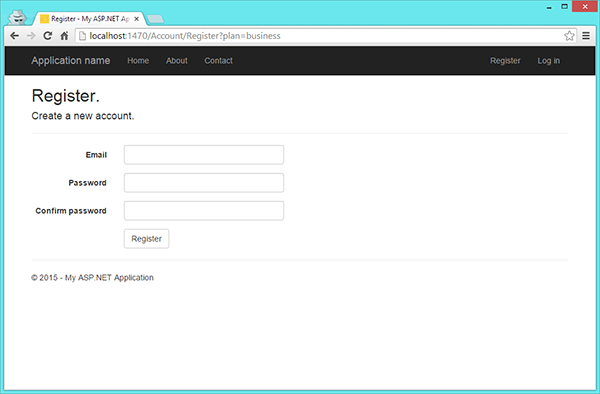 |
We only need one extra field here to identify the subscription plan that the user is joining. If you can see in the navigation bar of the photo, I am passing that as a GET parameter. In order to do that, I generate the markup for the links in the landing page using this line of code:
- <a href="@Url.Action("Register", "Account", new { plan = "business" })">
- Free Trial
- </a>
To bind the Subscription Plan to the back-end, I need to modify the class RegisterViewModel and add the new property.
- public class RegisterViewModel
- {
- [Required]
- [EmailAddress]
- [Display(Name = "Email")]
- public string Email { get; set; }
- [Required]
- [StringLength(100, ErrorMessage = "The {0} must be at least {2} characters long.", MinimumLength = 6)]
- [DataType(DataType.Password)]
- [Display(Name = "Password")]
- public string Password { get; set; }
- [DataType(DataType.Password)]
- [Display(Name = "Confirm password")]
- [Compare("Password", ErrorMessage = "The password and confirmation password do not match.")]
- public string ConfirmPassword { get; set; }
- public string SubscriptionPlan { get; set; }
- }
I also have to edit AccountController.cs, and modify the Action Register to receive the plan:
- [AllowAnonymous]
- public ActionResult Register(string plan)
- {
- return View(new RegisterViewModel
- {
- SubscriptionPlan = plan
- });
- }
Now, I have to render the Plan Identifier in a hidden field in the Register form:
- @Html.HiddenFor(m => m.SubscriptionPlan)
The last step will be to subscribe the user to the plan, but we'll get to that a bit later. I also update the design of the registration form.
 |
3.3 Login Page
 |
In the template we also get a login page and action controllers implemented. The only thing I need to do is to make it look prettier.
 |
3.4 Forgot Password
Take a second look at the previous screenshot, and you'll notice that I added a "Forgot your Password?" link. This is already implemented in the template, but it's commented out by default. I don't like the default behaviour, where the user needs to have the email address confirmed to be able to reset the password. Let's remove that restriction. In the file AccountController.cs edit the action ForgotPassword:
- [HttpPost]
- [AllowAnonymous]
- [ValidateAntiForgeryToken]
- public async Task<ActionResult> ForgotPassword(ForgotPasswordViewModel model)
- {
- if (ModelState.IsValid)
- {
- var user = await UserManager.FindByNameAsync(model.Email);
- if (user == null)
- {
- // Don't reveal that the user does not exist or is not confirmed
- return View("ForgotPasswordConfirmation");
- }
- // For more information on how to enable account confirmation and password reset please visit http://go.microsoft.com/fwlink/?LinkID=320771
- // Send an email with this link
- // string code = await UserManager.GeneratePasswordResetTokenAsync(user.Id);
- // var callbackUrl = Url.Action("ResetPassword", "Account", new { userId = user.Id, code = code }, protocol: Request.Url.Scheme);
- // await UserManager.SendEmailAsync(user.Id, "Reset Password", "Please reset your password by clicking <a href=\"" + callbackUrl + "\">here</a>");
- // return RedirectToAction("ForgotPasswordConfirmation", "Account");
- }
- // If we got this far, something failed, redisplay form
- return View(model);
- }
The code to send the email with the link to reset the password is commented out. I'll show how to implement that part a bit later. The only thing left for now is to update the design of the pages:
- ForgotPassword.cshtml: Form that is displayed to the user to enter his or her email.
- ForgotPasswordConfirmation.cshtml: Confirmation message after the reset link has been emailed to the user.
- ResetPassword.cshtml: Form to reset the password after navigating to the reset link from the email.
- ResetPasswordConfirmation.cshtml: Confirmation message after the password has been reset.
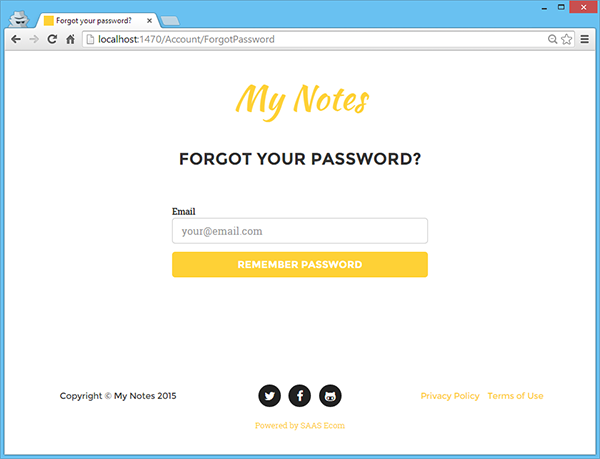 |
4. ASP.NET Identity 2.0
ASP.NET Identity is a fairly new library that has been built based on the assumption that users will no longer log in by using only a username and password. OAuth integration to allow users to log in through social channels such as Facebook, Twitter, and others is very easy now. Also, this library can be used with Web API, and SignalR.
On the other hand, the persistence layer can be replaced, and it's easy to plug in different storage mechanisms such as NoSQL databases. For the purposes of this application, I will use Entity Framework and SQL Server.
The project that we just created contains the following three NuGet packages for ASP.NET Identity:
- Microsoft.AspNet.Identity.Core: This package contains the core interfaces for ASP.NET Identity.
- Microsoft.AspNet.Identity.EntityFramework: This package has the Entity Framework implementation of the previous library. It will persist the data to SQL Server.
- Microsoft.AspNet.Identity.Owin: This package plugs the middle-ware OWIN authentication with ASP.NET Identity.
The main configuration for Identity is in App_Start/IdentityConfig.cs. This is the code that initializes Identity.
- public static ApplicationUserManager Create(IdentityFactoryOptions<ApplicationUserManager> options, IOwinContext context)
- {
- var manager = new ApplicationUserManager(new UserStore<ApplicationUser>(context.Get<ApplicationDbContext>()));
- // Configure validation logic for usernames
- manager.UserValidator = new UserValidator<ApplicationUser>(manager)
- {
- AllowOnlyAlphanumericUserNames = false,
- RequireUniqueEmail = true
- };
- // Configure validation logic for passwords
- manager.PasswordValidator = new PasswordValidator
- {
- RequiredLength = 6,
- RequireNonLetterOrDigit = true,
- RequireDigit = true,
- RequireLowercase = true,
- RequireUppercase = true,
- };
- // Configure user lockout defaults
- manager.UserLockoutEnabledByDefault = true;
- manager.DefaultAccountLockoutTimeSpan = TimeSpan.FromMinutes(5);
- manager.MaxFailedAccessAttemptsBeforeLockout = 5;
- // Register two factor authentication providers. This application uses Phone and Emails as a step of receiving a code for verifying the user
- // You can write your own provider and plug it in here.
- manager.RegisterTwoFactorProvider("Phone Code", new PhoneNumberTokenProvider<ApplicationUser>
- {
- MessageFormat = "Your security code is {0}"
- });
- manager.RegisterTwoFactorProvider("Email Code", new EmailTokenProvider<ApplicationUser>
- {
- Subject = "Security Code",
- BodyFormat = "Your security code is {0}"
- });
- manager.EmailService = new EmailService();
- manager.SmsService = new SmsService();
- var dataProtectionProvider = options.DataProtectionProvider;
- if (dataProtectionProvider != null)
- {
- manager.UserTokenProvider =
- new DataProtectorTokenProvider<ApplicationUser>(dataProtectionProvider.Create("ASP.NET Identity"));
- }
- return manager;
- }
As you can see in the code, it's pretty easy to configure users' validators and password validators, and two factor authentication can also be enabled. For this application, I use cookie-based authentication. The cookie is generated by the framework and is encrypted. This way, we can scale horizontally, adding more servers if our application needs it.
Written by Pedro Alonso
If you found this post interesting, follow and support us.
Suggest for you:
No comments:
Post a Comment