Now that the basic idea of how Actions from Controllers can be exposed through the API is understood, let's look at how an API Service can be designed for clients.
 |
Based on this design pattern, let's create a sample API that exposes a list of Classified items as a service to its clients.
Create a class called ClassifiedModel inside the Models folder.
- public class ClassifiedModel
- {
- public int ClassifiedID { get; set; }
- public string ClassifiedTitle { get; set; }
- public string ClassifiedDetail { get; set; }
- public DateTime CreatedDate { get; set; }
- public string ClassifiedImage { get; set; }
- }
Create a class called ClassifiedRepository inside the DAL folder where we will hard-code some data for the classified list and expose the list through a static method.
- public class ClassifiedRepository
- {
- //list of Classified Objects
- public static List<ClassifiedModel> classifiedList;
- /// <summary>
- /// get list of classified models
- /// </summary>
- /// <returns></returns>
- public static List<ClassifiedModel> GetClassifiedsList()
- {
- if (classifiedList == null
- || classifiedList.Count == 0)
- {
- CreateClassifiedsList();
- }
- return classifiedList;
- }
- /// <summary>
- /// Init a list of classified items
- /// </summary>
- private static void CreateClassifiedsList()
- {
- classifiedList = new List<ClassifiedModel>()
- {
- new ClassifiedModel()
- {
- ClassifiedID = 1,
- ClassifiedTitle = "Car on Sale",
- ClassifiedDetail = "Car details car details car details",
- CreatedDate = DateTime.Now,
- ClassifiedImage = "/carImageUrl.jpg"
- },
- new ClassifiedModel()
- {
- ClassifiedID = 2,
- ClassifiedTitle = "House on Sale",
- ClassifiedDetail = "House details house details house details",
- CreatedDate = DateTime.Now,
- ClassifiedImage = "/houseImageUrl.jpg"
- },
- new ClassifiedModel()
- {
- ClassifiedID = 3,
- ClassifiedTitle = "Room for rent",
- ClassifiedDetail = "Room details room details room details",
- CreatedDate = DateTime.Now,
- ClassifiedImage = "/roomImageUrl.jpg"
- },
- new ClassifiedModel()
- {
- ClassifiedID = 4,
- ClassifiedTitle = "Tree on Sale",
- ClassifiedDetail = "Tree details tree details tree details",
- CreatedDate = DateTime.Now,
- ClassifiedImage = "/treeImageUrl.jpg"
- }
- };
- }
- }
- public class ClassifiedService
- {
- public static List<ClassifiedModel> GetClassifieds(string searchQuery)
- {
- var classifiedList = ClassifiedRepository.GetClassifiedsList();
- if (!string.IsNullOrEmpty(searchQuery))
- {
- return (from m in classifiedList
- where m.ClassifiedTitle.StartsWith(searchQuery, StringComparison.CurrentCultureIgnoreCase)
- select m).ToList();
- }
- return classifiedList;
- }
- }
Similar to how we created our first TestController, let's create an API controller with empty read/write actions called ClassifiedsController and add the following two Action methods.
- public class ClassifiedsController : ApiController
- {
- public List<ClassifiedModel> Get(string id)
- {
- return ClassifiedService.GetClassifieds(id);
- }
- public List<ClassifiedModel> Get()
- {
- return ClassifiedService.GetClassifieds("");
- }
- }
Do not forget to add all the required references to the namespaces in each of the added class files. Build the project, and we are ready to test both of these methods now.
To display results containing the search parameter "house", hit the following URL in the browser: http://localhost/TestAPI/api/classifieds/get/house.
We should get the following response in the browser:
 |
You should see the following result:
 |
Content Negotiation
Up to now, we've seen examples of API that send XML responses to the clients. Now let's look at other content types like JSON and Image response, which fall under the topic of Content Negotiation.
The HTTP specification (RFC 2616) defines content negotiation as “the process of selecting the best representation for a given response when there are multiple representations available." Thanks to Web API's Content Negotiation feature, clients can tell Web API services what content format it accepts, and Web API can serve the client with the same format automatically, provided that the format is configured in Web API.
Requesting JSON Format
The HTTP Accept header is used to specify the media types that are acceptable to the
client for the responses. For XML, the value is set as "application/xml" and for JSON "application/json".
In order to test our API with the HTTP Accept headers, we can use the extensions available for the browsers that allow us to create custom HTTP requests.
Here, I am using an extension called HTTP Tool available for Mozilla Firefox to create the Accept header that specifies JSON as the response type.
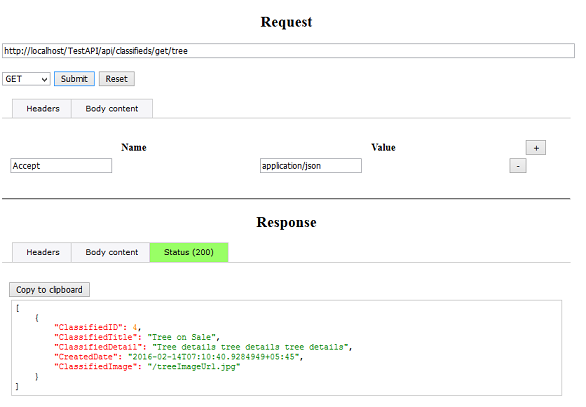 |
Image File as Response
Finally, let's see how we can send an Image file as a response through Web API.
Let's create a folder called Images and add an image called "default.jpg" inside it, and then add the following Action method inside our ClassifiedsController.
- public HttpResponseMessage GetImage()
- {
- byte[] bytes = System.IO.File
- .ReadAllBytes
- (
- HttpContext.Current.Server
- .MapPath("~/Images/default.jpg")
- );
- var result = new HttpResponseMessage(HttpStatusCode.OK);
- result.Content = new ByteArrayContent(bytes);
- result.Content.Headers.ContentType = new MediaTypeHeaderValue("image/png");
- return result;
- }
Here we are creating an HTTP response using the HttpResponseMessage class and setting the image bytes as the response content. Also, we are setting the Content-Type header to "image/png".
Now, if we call this action in our browser, Web API will send our default.jpg image as a response: http://localhost/TestAPI/api/classifieds/Getimage/.
 |
In this tutorial, we looked at how ASP.NET Web API can easily be created and exposed to clients as Action methods of MVC Controllers. We looked at the default and custom routing system, created the basic structure of a real-time business application API Service, and also looked at different response types.
Written by Sovit Poudel
If you found this post interesting, follow and support us.
Suggest for you:
REST WCF Service in ASP.NET
Visual Basic.Net Tutorials for Beginners
No comments:
Post a Comment